Wild garlic – when to pick & what to do with it
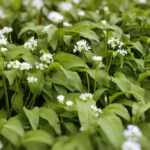
Paths that have been inaccessible to wellyless feet are starting to open up again as the ground freezes over. Yesterday, I took a walk through a small wooded patch of mixed broad leafed trees including Lime, Oak and Beech between my office and my home. The sky was blue, the sun bright, and the air was filled with birdsong. A week previous I’d noticed the lords and ladies Arum maculatum appearing, a sure sign that the wild garlic is on its way. Sure enough, yesterday (25th Feb), I picked enough to go with my morning mushrooms.

“That’s unseasonably early, the world is doomed”! – I hear you cry. Well, let us not get too carried away, Scottish friends of mine are often picking in December and last year, here in Bristol, I was picking wild garlic in mid Feb. In fact I can’t think of a year in the last fifteen that I haven’t been able to pick a crop of wild garlic by late February.
The peak time is later, and in a month, I’ll pick leaves as long as my foot. So if you want a nice big haul of wild garlic then that is the time to be going out – mid to late March at least it is here in Bristol. April is the time when conventional wisdom, along with Sunday papers and magazines, suggests that we go out and find this most famed and most prized of the wild foods. This is certainly when it is at its most conspicuous as it will have started to flower. But it will also have become a bit harder and stringy – certainly past its best.
Where to look for wild garlic
The woods! Wild garlic is an opportunistic plant and can be found beneath broad-leafed trees before their leaves get big enough to shade out the sun.
Among others, here in the UK that means you should be looking beneath oak, beech, ash, horse chestnut, walnut, and lime trees. I’ve also seen good crops of wild garlic living under hedgerows.
What do you do with Wild Garlic once picked – Wild garlic recipe ideas
Sometimes the most simple use is the best, and I like putting a few wild garlic leaves in a salad. Along with sow thistle, dandelion leaves, daisy flowers, and some garlic mustard. Pour over a little pine needle vinegar and bingo you have a dish that wouldn’t look out of place in a West end restaurant.
Hiding beneath the pasta sheets of a veggie lasagna is another tasty option. Or… you could use this slightly adapted recipe for wild dandelion spring-chi – a wild kimchi, from my latest book – Fermenting Everything.
Wild dandelion spring-chi
Yield: 1 pint
Prep time: Up to 1 hour including picking time
Initial fermentation: 3 days
Although dandelion spring-chi calls for a set of specific ingredients you really don’t have to stick to the list, nor do you have to be too over prescriptive about the weights or volume of the plant ingredients. This recipe is designed to serve as a guideline in order for you to make your own with what’s around you. I just so happened to make it in the spring, hence the name, however, you could rename it summer-chi or fall-chi and make it using wild edibles that you find in that season. As with all foraging, just ensure you know what you are picking.
If you make this in the spring I’d highly recommend sticking to the recipe and using dandelion greens. They are excellent for you and full of vitamins and minerals such as vitamin A, folate, vitamin K, and vitamin C, calcium and potassium. The fermenting process will enable your body to absorb more of this goodness too.
Equipment needed
1 x meat hammer, rolling pin or similar to pound the greens
1 x large bowl
1 x food processor or mortar and pestle
1 x pint/500ml mason jar
Weights
Equipment needed
½ oz/15 g ramps stems and flowers
2oz/60g dandelion greens
8oz/200g ramps/wild garlic leaves or any other edible green with toughish leaves
3 x magnolia buds (if available)
1 x chilli
1 oz/30g dandelion flowers
½ pint filtered or unchlorinated water
1 tablespoon sea salt
Instructions/method
1. Cut the ramps/wild garlic and the dandelion greens into 1 inch/3cm squares then place in a bowl and cover them with salt.
2. Pound them with the blunt end of a rolling pin or meat hammer until they release some of their juices this should take around 10 minutes.
3. Toss in the flowers – the reason for omitting the dandelion flowers until this point is so that they still show a flash of color in the jar.
4. Cut off the stem from the chili and slice it in half. If you want to reduce the heat of the chili but keep some of the taste remember to scrape out the inner pith.
5. Blitz the ramp stems and the chili in a food processor, then massage this paste into your leaves.
6. Stir in the dandelion flowers then stuff all of the contents of the bowl into your jar and then top up with filtered or unchlorinated water.
7. Add your weight or zip lock bag ensuring the contents of the jar remain below the water line. Add a small piece of material over your jar to protect from airborne pests.
8. Leave to ferment, out of direct sunlight and in your usual fermentation spot, for three to four days. The cooler the place the longer fermentation will take.
© 2021 THE WILD GENTLEMAN